Showing posts with label Trash To Treasures. Show all posts

Monday, August 30, 2010

Furniture Makeover! From boring, outdated armoire to very hip, modern and oh so tres chic Barmoire!

What is a "Barmoire," you may ask?  It is a fancy name I came up with for an outdated armoire, like so...


...that is repurposed into a new (looking), modern Bar, complete with sliding wine rack drawers, mirrored tile, fancy (and eco-friendly) lights and a wooden glass rack overhead.  As in, like so...


Here's are a few close ups of the components:


the inside


battery operated, eco-friendly L.E.D. lights add nice, soft mood lighting at very little expense to you and the environment

...and the sliding wine rack drawers are a nice place to store your favorite bottles of Chateau Bluh Bluh Bluh, '57 (obviously, I'm very knowledgeable about wine).  

the finished piece complete with glass knobs.


So, before you throw out that hulking or outdated piece of furniture, you might ask yourself, "Hmmm....I wonder if I can use that for something else?"

Tuesday, May 11, 2010

New item for sale! Mid Century Modern Metallic Silver Cabinet/Bar/Hutch or what would YOU use it for? -- Sold!

This is a very nice, Mid Century Modern Cabinet with sliding doors that could be used for a bookcase, extra storage, a hutch, a fancy bar or to house a collection of your favorite art, oddities or collectibles.  It has a Metallic Gunmetal Silver finish and the original brushed chrome handles have been polished to perfection!


This is in excellent condition and is ready to be put to use! It is for sale in the Los Angeles area on L.A. Craigslist and Apartment Therapy Los Angeles Classifieds (click the links to see the ads).


Email me through Craigslist, ATLA or right here, via my blog if you have questions or would like to see this in person.  Thanks for visiting my blog!

Tuesday, May 4, 2010

Trash To Treasure Series! Ugly Duckling Dresser turned into Dove Grey Beauty!


This was a piece of furniture I acquired as a partial trade toward a refinishing job I completed fairly recently.  The dresser had good bones (frame and panel sides and a solid top and drawers) but the finish was badly scratched and there were enough holes (30, in all!) on the drawer fronts to make it look like it had been part of the set for the movie, Scarface.  The one thing it had going for it though (besides the good bones) was the interesting, faceted drawer fronts.  I wasn't sure what I would do with it but I knew it was an ugly duckling just waiting to be turned into a swan.

I planned to refinish this and put it up for sale but I had a client who came to see another dresser I had and she liked this one so much (ugly duckling and all) that she purchased it before it was even completed and had me finish it to her specifications.  I sanded this over a few days (did I mention it was REALLY badly scratched?) and plugged up all the "bullet" holes.  I then mixed the dove grey paint (just enough for this one piece so, it will never be replicated exactly again).  It was then primed, painted a few coats, all by hand, over a few days and then I hand applied different colored pigments to give it an aged, burnished look.  It was then waxed, by hand, using a mixture of wax and pigment to give it another layer of color and then distressed.  The distressing revealed layers of paint below that ranged from mahogany stain to a navy blue to a bright taxi cab yellow underneath.  The resulting finish is multi-layered, giving this a patina that looks like it has been in the family for ages.


But what about hardware?  We thought about Glass handles from Anthropologie but it would probably require two per drawer (ten, total).  The handles could have easily cost as much as the dresser itself so, my client, wanting to stay within her budget, asked me if I could come up with a more economical solution.  So, I did: leather handles.  I had some leftover, metallic silver, leather that I purchased to make some guitar straps a few years ago.  I used that to make five leather handles like you might see on a vintage piece of luggage.  I made loops from the same leather and nailed them in for a secure yet modern solution to expensive, store bought hardware.

Devising a final look for this piece was challenging as I didn't know what it looked like originally but it helps to have a client that's open to suggestions, willing to try something new and trusts in your vision--even if you don't know what that is right away (thanks, Sandra)!

Enjoy your new (vintage) dresser!

Wednesday, April 14, 2010

Custom Color! Vintage Desk Redux in Siena Sunset!


This is a before and after pic of a desk I just refinished in a custom color that I call "Siena Sunset."  I mixed the color myself, for a recent client who had seen another desk of mine, painted in a lighter shade of orange called, "Marmalade Glaze."  He was looking for something a little darker, like an Hermes Orange and I was more than happy to oblige him.  The desk has six coats of paint, applied by hand and two coats of hand applied wax.  The original brass hardware (which was caked with layers or tarnish) was cleaned and polished carefully, so as not to remove all of the patina, keeping its warmth intact.  I love the color and now am thinking if I could make some room in my place for a desk...

Thursday, April 8, 2010

New Item for sale! Vintage Tall boy Dresser with turned knobs -- Sold

Here is a new item I just finished and just posted for sale on Craigslist!
Vintage Shabby Chic Wood Dresser Tall Boy -Free delivery - $175 

This is a Vintage, solid wood Dresser with four drawers and turned wooden knobs. 


The boards that comprise the top and sides of this vintage dresser are made from one solid 15 inch wide board!  Very nice and very hard to find nowadays (as trees are now rarely allowed to grow to the point where you can harvest 15" wide boards from them).  This might have been made by a single furniture maker (perhaps for personal use) as the construction doesn't appear to be factory made.


This is painted with a custom color I mixed myself, which I call Storm Cloud (a combination of dove grey and a creamy almond color).  I then wax this with a homemade wax that has a bit of white liming added to it, to give it a deep, weathered look that is actually very soft to the touch.


 The turned wooden knobs are stained with a Colonial Red stain that I mix myself, allowing the grain to still show through and the piece is lightly distressed.


This vintage dresser would look great in a rustic, shabby, paris chic or beach cottage home and will last for years to come.  It is ready to be put to use today!  If you live within 15 miles of Los Feliz, I offer free delivery for this piece.  Thanks for looking and if you'd like to check out the Craigslist ad, you can view the link here:

Vintage Shabby Chic Wood Dresser Tall Boy -Free delivery - $175

and if you're interested in this piece, or in refurbishing a piece you already have, you can email me through here or Craigslist.  Thanks for visiting my blog!

Tuesday, January 26, 2010

Bloomsbury Birdhouse No. 1 -- SOLD!!

New Item in my Etsy Abodewell Shop:


Bloomsbury Birdhouse No. 1

This is the first in a series of decorative birdhouses and architectural elements for the home.  It is made of recycled materials and opens to display your own little inspirational interior.  The images of handwritten letters, intimate interiors and art all combine to create a little haven where you can escape.  You could also use this as a birdhouse (wink).

More of these to come...

I'm also extending my support to the Haitian Relief into February.  For the months of January and February, purchase any item in my Etsy Shop and 20% of the proceeds of  your purchase will go to support the organization, Doctors Without Borders, in their effort to help the people of Haiti.

Thanks!

Thursday, January 14, 2010

Trash To Treasure Series: Vintage Green Desk found on street

This is the first in a new series of articles about trashed items I find (sometimes on the street, sometimes around my house and sometimes from clients) that I rework into treasures.

I found this vintage green desk a couple of blocks from where I live.  It was put on the street for trash but from the moment I saw it, I knew it was worth saving.


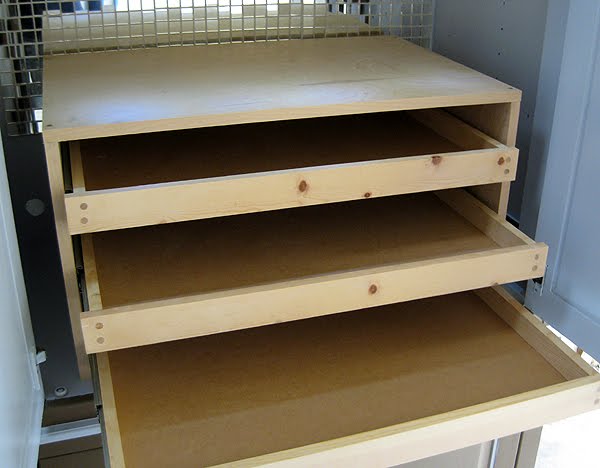
Here it is in my workshop.  My first exam of this patient turned up a beat up finish, peeling quartersawn oak veneer, over solid hardwood (which places its manufacture probably somewhere between the 1930's to the early 1960's), a solid hardwood base (oak, as well) in pretty good condition (and very stable still), replaced knobs, and drawers that still slide in easily (albeit with worn drawer bottoms).  There was a black wooden board attached to the right side back (for what, I have no idea) and a narrow board of pine that was used to replace a missing side, screwed in with sheetrock nails (ouch!), leaving a gap exposed at the side's top (perhaps to air out stuffy papers in the drawer?).


There is some writing on the front of the desk that looks to be from the hands of children, which makes me happy to think that at least somewhere along the line this desk was shown some love by being used as a play table. 

Despite the black eyes and missing teeth, I could tell that this little desk was a swan waiting waiting to be transformed.  The scrolled, front legs were beautiful and the base was solid.  The veneer on the top and drawers was a little rough around the edges but this was not a big deal to sand out, fill and smooth over.  I decided to bathe it in a fresh coat of the lovely green it came in (probably not the original finish) because I could picture sitting at it and being refreshed just by the color.  Hell, even if you had writer's block, it would be nice to just sit there and look at that color!

So, first step, clean it up, wipe it down and remove the offending boards in the back and side and the thorns they were attached with.


I then cut a piece of solid wood for the right side on the table saw and glued, nailed and clamped it into place, replaced the "air conditioner" board that was there. 


I then began the initial sanding using 150 grit (fairly fine but still rough enough to take off any loose finish without leaving too many scratch marks).  In this process (which took a couple of hours) I realized the veneer that surrounded the edge of the table top (and parts of the table top's solid wood edge underneath) was too damaged to be filled.  I could redo the veneer but that would probably result in the same condition after time.  I decided to replace the veneer with a thin, solid wood strip around the table's edge, giving it sturdier protection against bumps, bruises, scratches and inevitable peeling.


After hand planing the top of the strip so that it met flush with the table's top (which was slightly uneven [which is natural for the age of an everyday piece of furniture like this]), I gave the entire desk a couple more sanding passes, using finer, 220 grit sandpaper.


Since I'm going to repaint this, it's not necessary to "strip" this down to the bare wood.  In fact, in most cases, you should always try to avoid completely stripping a piece of furniture (especially, vintage and antique pieces and especially pieces with veneer) and instead, aim for a smooth, even "surface" to which you can apply a newer finish.


Detail: This is the original brass keyhole in one of the drawers.  The desk came with two locking drawers (the locks, which were mortised into the top of the drawer front, are brass too).  If only I had the original key...the secrets I could lock up in there (if I had any).


At this point, everything is sanded, filled, repaired and plucked.  It's time to paint!


The first coat goes on smooth, using semi-gloss latex enamel (a green that the guys at my local Home Depot mixed up for me using a green background from a magazine ad that was pretty darn near close to the original hue) and a small smooth roller pad.  This gives it a nice, even, streak-free coat that is difficult to get using a paintbrush.  I perch the table on four small paint cans so as to get as much paint to the bottom as I can (later, when the paint on top is dry, I'll lay the desk on its back and paint the bottoms of all the legs--I like to be thorough).  The green paint on the side of the drawer on the left is from the original green paint, so I left it there, for three reasons;

1. I like to remind myself of the humble beginnings of an item, especially when you can only see it on the inside (I believe objects can have dirty little secrets too).

2. No one but the owner of this desk will see the green paint on the side of the drawer (and if they do, they shouldn't be looking in there in the first place).

And 3. I believe that behind every beauty is an ugly duckling just waiting to be discovered.

Okay, after a few more coats (took me about four coats to get to the finish I liked and I ran through about a half a quart of paint--not bad--the smooth roller, although more expensive than a cheap brush, actually saves you money because it spreads less paint more evenly).

And now, the reveal:  Voila!


I left the silver replacement knobs (even though they clashed with the brass keyholes a little--that's okay--not everything should be so matchy matchy) because they still had a nice shine and they give the desk a little pop!

Despite four coats of paint, the finish on the top still reveals the wood's grain pattern, which I always like to see (it's nice to be reminded that you're sitting in front of something from nature [that is now in your home!]).

The finished desk, all dressed up and ready to go!


Now, if I only had something to write about...hmm...


UPDATE: This item has been sold!